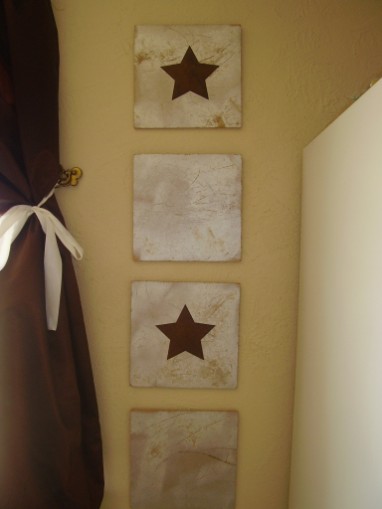
Scroll down and be inspired. The featured decorating ideas were not only simple, but VERY inexpensive. 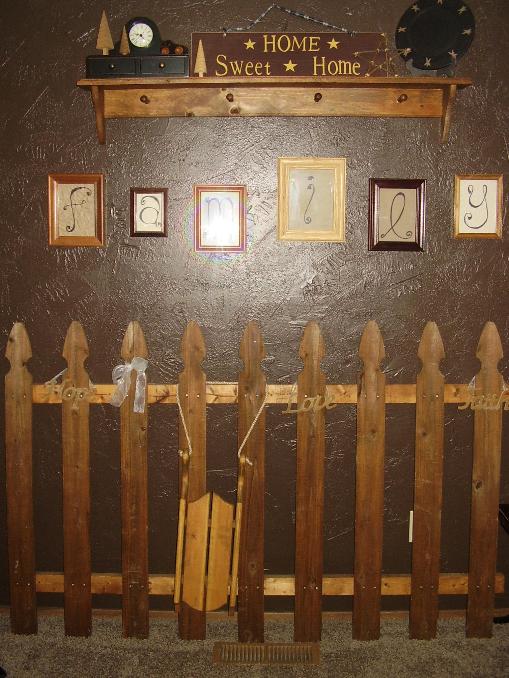 Express yourself by using unique and creative ideas! The fence cost me $4.00 at the thrift store. I also purchased the frames from the thrift store for 50 cents each. I then took old cereal boxes and brown paper sacks and cut them to fit each frame. Using a marker, I wrote the letters by hand and framed them. If you don't like your handwriting, you can always print off letters from your computer onto cute paper. Use this idea to spell out your favorite words, names, phrases, etc. |
||||
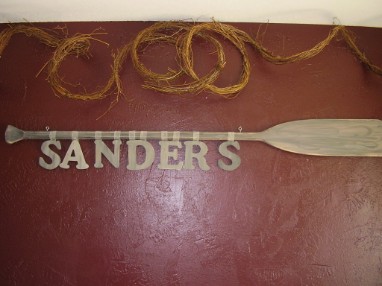 This is the same oar that I have had hanging in my house...only I have added the letters to our last name and hung them with ribbon. 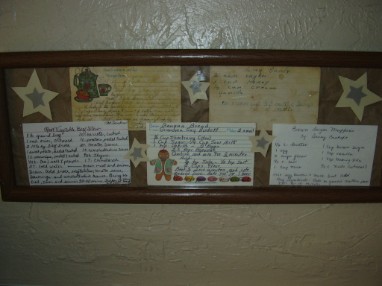 This is my newest project. I asked my mom, in-law, and grand mothers to hand-write their favorite recipe. My mom had an old handwritten recipe from my great grandma as well. I put them in a frame, and now, I hang it in my kitchen!  One creative idea is to tack on fabric to picture frames. I hot glued left over fabric pieces from our wedding to this frame to add extra charm. 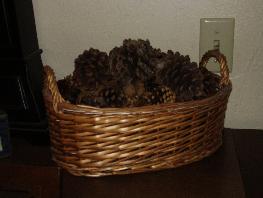 This idea is much more common, yet brilliant. I purchased the basket at a thrift store for 50 cents and added cinnamon pine cones for an incredible smell. 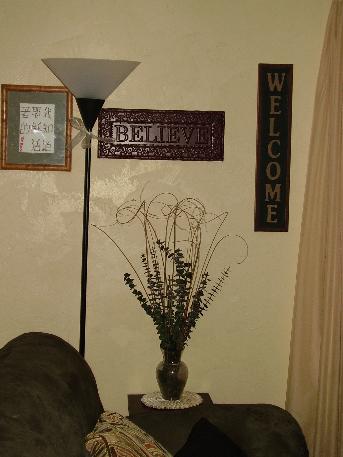 Arranging art in random order makes a room much more relaxed and cozy. 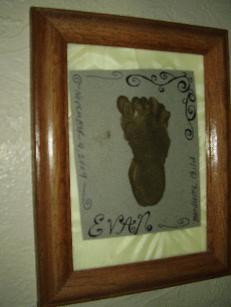 Hanging memories is a wonderful way to beautify your walls. I simply had my children leave hand and foot prints on the back of cereal boxes. I then used a ball point pen to add designs to the page. I set the cardboard on top of fabric (again, left over from my wedding) to create a unique, but darling momento.  Layer your frames! 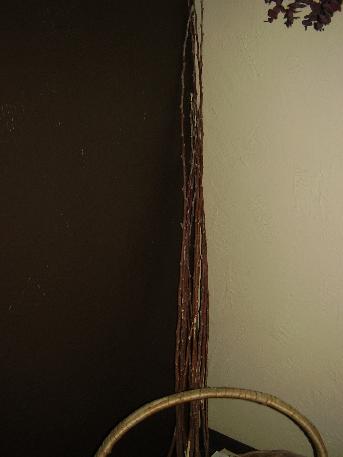 A simple solution to breaking up boring walls is to use sticks. I found these sticks in my sister-in-law's yard. Total cost: FREE 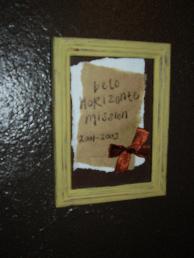 My husband served an LDS mission. I bought the frame for 50 cents at the thrift store and painted it yellow. I tore regular printer paper and a brown paper bag into a square...wrote on the brown sack and layered them onto each other. I added a ribbon bow just for fun. 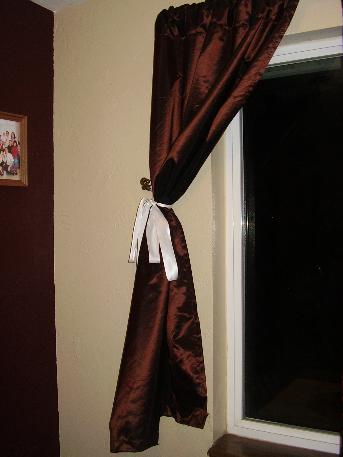 All of my curtains come from the fabric bargain bins. I NEVER buy pre-made curtains. They are far too expensive, and besides, they are so easy to make. This curtain ( and it's match) cost four dollars total. Compare that to $20.00 for the pre-made ones. 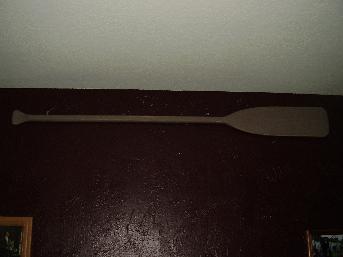 I painted an old oar and hung it on my wall. I may eventually hang pictures with ribbon on it. 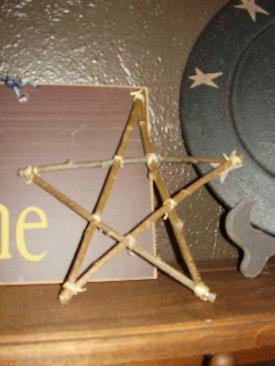 These stars can be made in ANY size. You can hang them alone on a wall, or use them on a shelf like this one, but regardless, they are easy to make. Take five straight sticks, glue them together in the shape of a star, and wrap raffia, string, thread, or anything of the sort around the points of impact to make them stronger. 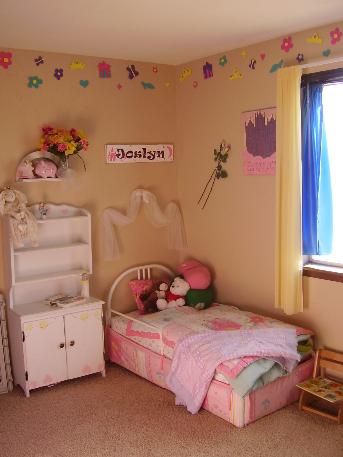 A cute way to decorate a child's room is to use tacky putty to hang foam cut-outs. You can purchase pre-made cut-outs, but it's much cheaper to make your own by purchasing sheets of colored foam. It's inexpensive and very cute. I bought the sheets of foam from the Dollar Store. Again, the curtains came from the bargain fabric bin. 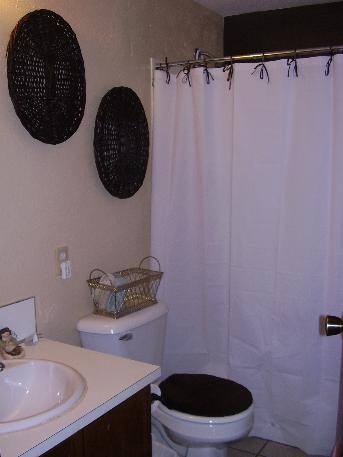 For the wall decorations, I found old basket lids for 25 cents each and hung them. The shower curtain is being hung up by ribbon. It's cheaper than the rings, and much more fun. In the past, I have cut out fabric in the shape of flowers and have tacked them onto my shower curtain by using a needle and thread. I backed it with clear packing tape to prevent them from ripping off and to keep water from leaking. It worked wonderfully and was super cute.  Flowers (real or not) brighten any room 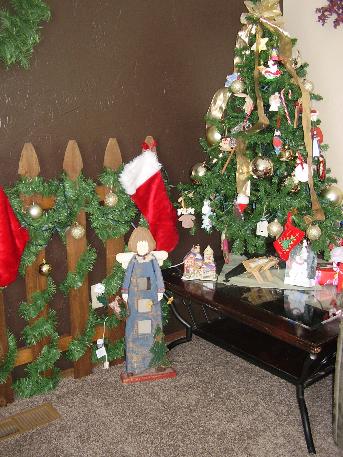 Christmas Decor--When it comes to the Holiday's, garland and lights are essential for a festive and cozy feel. |
 To make these tiles, I simply took squares of thin ply-wood and spray painted them. While the paint was wet, I brushed them with branches from a tree...that distressed each tile to look a little different. I then glued on some tin stars I found on clearance at a local craft store. Everyone swears they look like real tiles....and are shocked when I tell them what they really are! 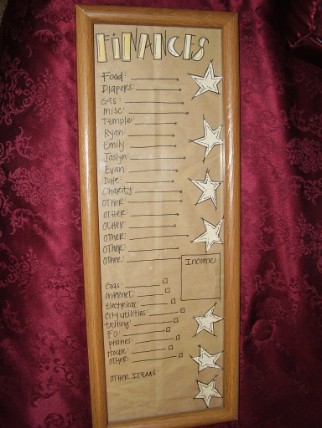 I am huge on budgeting. I love playing with numbers and keeping to a spending plan. I used to write our budget on a random piece of paper pinned to a cork board, but I recently decided to take a more economical route. I have written our budget on a recycled paper bag and framed it. Each month as I go over finances, I can write on the glass with a dry-erase marker the amount of money allotted to each area. As I spend money over the month, I simply erase the old number and put the new amount in. What I love about this is that I won't have to keep throwing out paper...and it's super cute. I have heard of using this same idea as a calendar. To do that, you simply need to frame a blank calendar template---decorate it and make it cute, or leave it plain. Each month erase the old and write in the new! It's so easy! 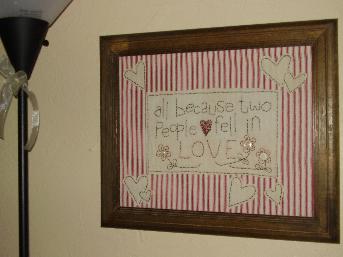 I hand stitched the above piece. I used an old white t-shirt dyed in herbal tea for the stitching. The frame was purchased at a thrift store. The total cost was less than $1.50. It took about 6 hours to stitch as I did not use a pattern. 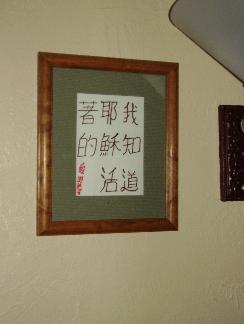 My sister-in-law served an LDS mission in Hong Kong. I asked her to create this piece for me. Any foreign language framed can be a fun and unique focal point. 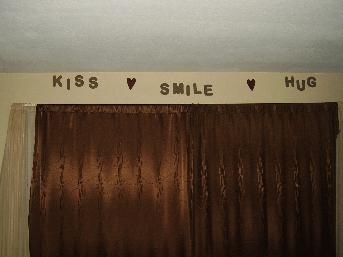 This photo makes it a little hard to discern, but the words "Kiss, Smile, and Hug" are wooden letters purchased at a craft store (using a coupon). They cost no more than $4.00 to purchase all. I painted them and tacked them on our wall by using tacky putty. Tacky putty is a perfect solution for those renting, as it doesn't harm the walls. 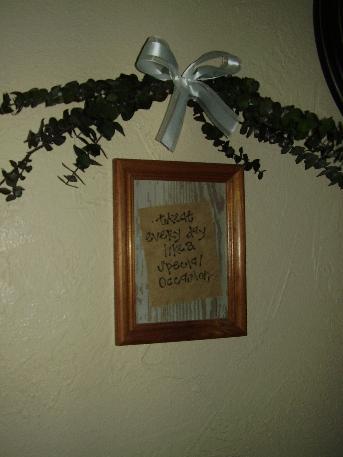 My favorite quote by Thomas Monson is, "Treat every day like a special occasion." I used left over scrapbook "woodsy" paper for the base. I used a ball point pen to write on an old wrinkled brown paper bag. The frame was 50 cents at the thrift store. I also made the eucalyptus wreath above the frame by purchasing a large bouquet of eucalyptus ($2.50 after using the 50% off coupons common at most craft stores). I then took four bread ties and stripped the paper off to expose only the wire. I wrapped the ties together to make one long wire, and then wrapped it around the eucalyptus branches to keep them together. It is a super easy and cute wreath. PLUS the eucalyptus smells wonderful. One large bouquet makes about 5 wreaths all varying in size. 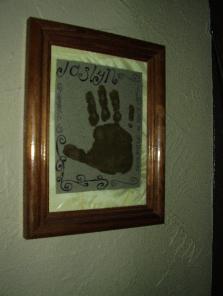 My daughter's hand print 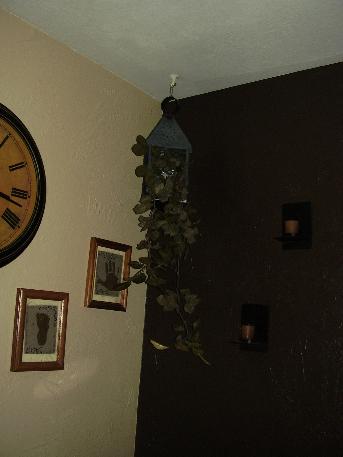 I hung an antique looking lantern on a plant hanger and added a plastic vine. 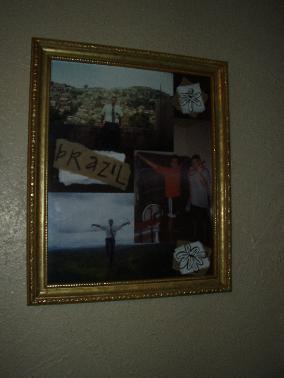 This is a continuation of my husband's mission photos. I simply scrapbooked photos from his mission and hung them in a frame. It's a fun and cute way to remember wonderful moments. You could do this with family vacations, weddings, births, etc. 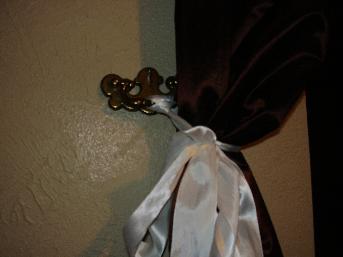 I have seen curtain holdbacks for sale at outrageous prices. In fact, I was at the store the other day and a woman purchased some for $40.00!!! My holdbacks are simple drawer handles. I purchased them for .50 cents each at the thrift store. Old door knobs make cute hold backs as well. 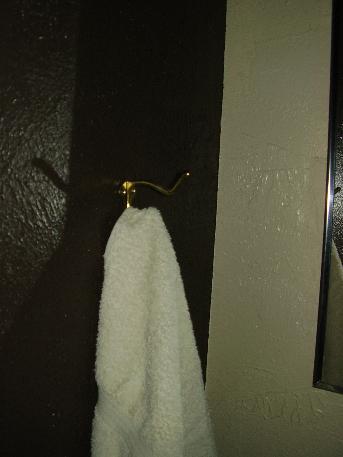 Towel racks are often expensive. So, why not use 50 cent coat hooks? 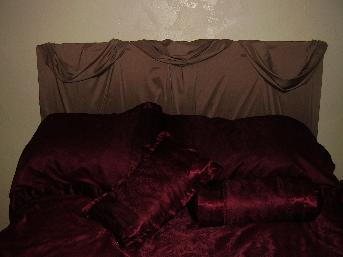 Make a headboard with cardboard and material. This headboard cost three dollars to make.  For those who want to specialize their children's room, but don't want to use paint to do so, resort to CARDBOARD! The tree and the frog are both cardboard cut-outs that i drew, painted , and tacked on the wall with tiny nails. 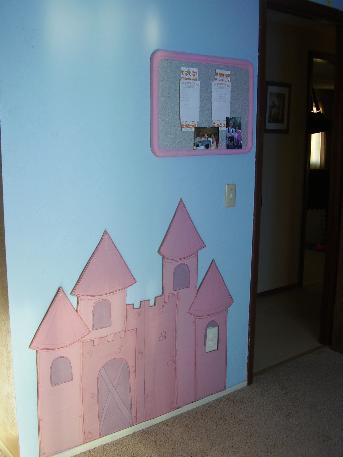 A cardboard cut-out of a castle in my children's room.  Play around with layers and textures. It makes everything much more interesting. |
|||